Patterns

Showing posts with label crafts. Show all posts

Monday, May 16, 2016

Competitions galore

We have so many things going on for our sewing fans right now, we really hope that you are taking advantage of all our competitions and FREE stuff that we are giving away! Click on the images below to find out more on each competition.

We are running this raffle through our Etsy store in order to raise funds for our charity, CO-SANC... for only $1 you can help us to raise funds for this worthwhile cause.


A Mother's Day Gift from us to you during the month of May. Spend $5 or more in our Etsy sewing pattern store and use the coupon code MOM001FB to get a 10% discount. Valid until 31 May 2016


This week we are launching two men’s shirt patterns.

We decided that everyone who purchased the men’s simple waistcoat sewing pattern in the last week of April would receive a free copy of out men’s fitted shirt sewing pattern being launched this week... GOOD NEWS! We decided to extend this special until the end of May 2016! So everyone who buys our men’s Simple Waistcoat Sewing pattern from 25 April to 31 May will receive a FREE copy of our men’s fitted shirt sewing pattern too!


Join our sewing challenge that we are running throughout 2016 and stand a chance to win an Acer laptop!

Share your creations with us on twitter... click here for more information on the competition and rules.

Here are the themes we have already been running during 2016:
January: Ties – sew any of our tie patterns
February: Dresses – sew any of our dress patterns
March: On Top – sew and share any of our tops, jackets, waistcoat... pretty much anything you would wear “above the belt”
April: Black and white – sew anything you wish from our patterns in this colour combination
May: For The Ladies – make anything from our sewing patterns for women, and remember to share it with us on twitter @MySewingPattern


HAPPY SEWING

Tuesday, March 8, 2016

The life of a sewist

Today is a grey and overcast day, perfect I think for working in my PJ’s while a draw up a few new sketches for patterns I’m going to be releasing.

I have been running my sewing business now for five years, it’s amazing how time flies. Selling my digital sewing patterns has allowed me the opportunity to work from home, sometimes I feel so spoiled to be so lucky.

I want to say a big thank you to all my amazing sewing fans who have allowed me to achieve this in my life. Anyone who knows me knows that my cats and dogs are my children (I currently have 8), and for the last 6 months my oldest baby has been terribly sick, my Jack Russell named Onyx. She has chronic renal failure and some days she requires 24 hour care. Being able to work from home has allowed me to look after her and help her to live a full and happy old age. I am truly grateful to everyone who buys my sewing patterns and online products, you have done more for me than I can possibly express. Thank you! Thank you! Thank you!


I hope you all have an amazing week ahead, and very successful sewing projects. Now enough of the serious stuff and back to the sewing fun.

Here’s a tip when putting together your newly printed A4 pages to create your sewing pattern: Use 2 sided tape to join the sheets of paper together. I do this firstly because the pages are less likely to come apart in the long term and secondly it allows me to fold up my patterns when I put them away, and when I am ready to use them again, I unfold them and use a warm iron to go over the pages to smooth them out (no steam, this will damage the paper).

This week’s patterns in review


Our first maternity dress sewing pattern was launched last week. (I tried to make my dressmaker's form look pregnant by pinning a pillow to it o_O )


This fashionable dress is perfect for the mum-to-be who has a special occasion to attend, or who simply wants to look stylish in the upcoming spring and summer season.

I also launched a set of two maternity sewing patterns, the Isabella dress and the Jacqui dress together make the perfect combination.


To celebrate 5 wonderful years of sewing we have decided to launch this amazing offer. You can opt to have our range of brand new sewing patterns sent to you, every second week for a year.
 
The total value of this is over $80, but instead we decided to practically give it away at $29. Which means you’re making a huge savings of over $50! We are only running this amazing special until 10th March, so take advantage of it now!

When you purchase this amazing offer, you will be receiving your first pattern immediately available to download, the ladies short waistcoat.
 

Until next time...


Tuesday, March 1, 2016

Marching along

My mind is just blown by the fact that another month has gone by already. On the bright side, with new months there are a lot of new opportunities, and a few more sewing projects to begin.

I know some of our sewing fans weren’t too sure about the new Shopify store we have been using with our Facebook Page. We do still have our Craftsy store up and running for those who prefer to use this site, and we also launched our Etsy store this past week, which has already become quite busy. So you are welcome to use whichever platform suits you best, our aim is to make access to our sewing patterns as easy as possible for you.

Our  March sewing challenge. It is “ON TOP”, so you can make anything from t-shirts, to blouses to waistcoats the choice is yours! Remember to look up our previous post on the sewing challenge, so you know the rules and stand a chance to win that cute little Acer Chromebook!


This week’s patterns in review


We had an incredibly busy week last week, we launched a whole new range of waistcoats. Our waistcoat patterns have always been some of our top sellers and we are proud to be able to now offer you a much wider variety.

Our new range includes the Men’s Simple Waistcoat
My friend Jude being a super awesome model for me

We then have the LadiesSimple Waistcoat which is super stylish, and a huge hit already.
 
The Ladies Simple Waistcoat

Both of these waistcoats include slit pockets, as well as adjustable belt straps at the back for a more tailored finish. We have also included them in a Simple Waistcoat sewing pack together, so you can purchase both and save money!


And to top it off, I included this incredibly cute and fashionable Ladies Short Waistcoat in the range to help you finish off your new look.

There are plenty more sewing patterns being launched this week, to keep posted on what’s coming up, like our FacebookPage! Until next time...

Happy sewing!


Wednesday, February 17, 2016

Thanks Mom!


My entire life I have been sewing, and doing embroidery or knitting and crotchet, thanks to my mom. I know she had me doing these things (before the times of cellphones and tablets) just to keep me out of her hair, in the end it made a big impact in my life. Being a third generation seamstress from a line of textile creative woman certainly helps, so it was no coincidence that I found my passion in creating clothing.

My business is my passion, and my baby and I am continually looking at ways of improving my products and ease of accessibility to them. I have recently installed the Shopify app on my Facebook page www.facebook.com/mysewingpatterns and I am currently testing it to see if it will work for you, my customers.

I have also added a few pages to my blog, so you can now purchase patterns directly from the blog, just click on the relevant page link to the right of the blog (or for mobile use the scroll down arrow alongside the home page bar) and it will take you to view the patterns you are interested in.

I really appreciate for those who purchase patterns through the store to please send me your feedback so that I know whether or not I am on the right track with this system. You can email your responses to mysewingpatternz@gmail.com Positive and negative feedback is welcome.

This week’s pattern in review


Mothers Day Handbag

Because my mother has played such a huge roll in my sewing success, last year to celebrate my her, I designed a handbag pattern for her and to share with all my sewing fans. Little did I know it was going to become such a hit.
It comes in two size variations and can be made in an assortment of fabrics. You can use a fun print for a stylish summer bag, or use a PU or leather type fabric for a more professional look.

Sunglasses pouch


And what’s a fashion handbag these days without an awesome, matching sunglasses pouch. This super easy sewing pattern is the perfect complement to any stylish bag.


Our February sewing challenge. It is “DRESSES”, very simple and easy, and you can make anything as part of the competition from a very simple LBD to a fancy wedding gown, the choice is yours! Remember to look up our previous post on the sewing challenge, so you know the rules and stand a chance to win that cute little Acer Chromebook!

Happy sewing!


Wednesday, January 20, 2016

JOIN OUR SEWING CHALLENGE AND WIN

Do you want to get more sewing done in 2016? Whether to practice and hone your skills, or to simply create a fun and affordable wardrobe for you, your friends and family? Then join our sewing challenge for 2016.

By joining our challenge you also stand the chance to win an Acer Chromebook. 

How do you join?
Every month we will be posting a sewing theme, for example for January the sewing theme is ties. Create a sewing project, in theme, take a picture and share it with us on twitter using the hashtag #MySewingPatterns


An example of how your tweet must look

There are a few rules of course:
  1. The projects posted on twitter must be from the Boo Lè Heart / My Sewing Patterns range of sewing patterns (CLICK HERE or click on the button to the right of the page to visit our online store).
  2. A new pattern theme will be tweeted every month, so remember to follow us on twitter @MySewingPattern
  3. Entrants can make any of the 12 themes supplied at ANY time during 2016, as long as you mention which month it is for. For example, you can still make your January tie in March 2016 or sew all 12 themes in the 12 days of Christmas, the choice is yours.
  4. You don't have to make a specific pattern, as long as it's in theme. For Example if the theme is "make a dress", you can make a dress from ANY of our available dress patterns.
  5. For an entry into the draw to win the computer, entrants must create at least 6 of the sewing challenges.
  6. Entrants who create all 12 challenges will receive 2 entries into the draw.
  7. The last sewing challenge must be shared with us on twitter no later than 30 December 2016. The draw for the winner, and announcing the winner on twitter will happen on 31 December 2016.

Feel free to add your own sense of flare and style to the patterns!

Here are the themes we have already been running during 2016:
January: Ties – sew any of our tie patterns
February: Dresses – sew any of our dress patterns
March: On Top – sew and share any of our tops, jackets, waistcoat... pretty much anything you would wear “above the belt”
April: Black and white – sew anything you wish from our patterns in this color combination
May: For The Ladies – make anything from our sewing patterns for women
June: Something for the Guys - use any of our men’s patterns for your entry
July: Anything Vintage, Pin-Up or Rockabilly style - bring those classic styles back to life
August: For the Home - Make something that makes your house feel like a home

Good luck and Happy Sewing!

Thursday, November 26, 2015

Silly season


Black Friday is tomorrow, and with the silly season ahead most of us are dreading popping into stores to do gift and seasonal shopping.

If you are anything like me, then you try to avoid it altogether, opting rather for online shopping, or better yet, creating gifts from the heart at home.

To help you get started, I have reduced the price of most of my sewing patterns down to a mere $1 for our black Friday sale (click on the button to the right of the page), including the drawstring bag which can be used as an ideal Christmas gift bag (see earlier tutorial on how to make your own iron on festive prints right at home).

My elves and I are busy scurrying away to finish a range of new patterns that I will be posted for you over the next couple of weeks, including bags and dresses that will create perfect outfits for the many gatherings you may have to attend this festive season.

If you need to go out, let your hair down and party… well then do it in style!

I will also be making more regular blogposts and free tutorials, so remember to follow my blog by email (window to the right of the page) to get all the latest updates right to your inbox.

Remember to like our Facebook page www.facebook.com/mysewingpatterns as I will be posting loads of specials, and perhaps even a flash sale or two over the next month, as well as images of patterns that will be available in store.

Brace yourselves for the exciting month ahead, and happy sewing!


Tuesday, October 6, 2015

Make your own holiday bags

Themed drawstring bags


This is a quick guide on how to print your own iron on stickers at home to apply to themed bags. This idea is really great for Christmas themed gift bags or Halloween themed Trick or Treat bags.

You will need:
·         My drawstring bag pattern (available in my online store, click on the button to the right of the page.
·         Thick iron on interfacing
·         An ink jet printer.

Step 1:

First I cut out a really thick iron-on interfacing to the size of A4 sheets, and placed them in the feeder tray of my ink jet printer, making sure the glue was on the opposite side to be printed.


Step 2:

I got some awesome pictures off the internet and printed them (as I would paper), though you can print any image you like, even photographs of friends and family - or your favourite cat.


Step 3:

I cut out the images and ironed them onto the main fabric of the bags. The best time to do this is after cutting out the pattern pieces, but before sewing it all together.


Step 4:

Finish putting your drawstring bags together, according to the pattern and instructions of my Easy 10 Step Drawstring Bag


Step 5:


Share your awesomeness and your new bags with friends and family.


HAPPY SEWING AND HAPPY HOLIDAYS!!!

Thursday, September 24, 2015

Create your own iron on lace


Have a gorgeous iron-on lace ready at hand is always welcome in my studio, it is an easy to apply option for a beautiful finish to compliment almost any garment.

Unfortunately iron-laces are not always easily found in stores, so here is a quick tutorial on how to make your own.

You will need:
A heavy woven fabric, preferably synthetic or an embroidered fabric. (You can pick one with a pre-existing design or a plain fabric and create your own design).
Fabric chalk
Hot glue gun and glue sticks
Small fabric cutting scissors
A candle and something to light it with


·         On the fabric of your choice, trace out the design with your fabric chalk on the wrong side of the fabric. A thick woven fabric is ideal as when using thin fabrics, the glue from the glue gun can give it a “blotchy” affect. Thicker fabrics are more resilient to hot glue and during the ironing on process.


·         With your hot glue gun, on the wrong side of the fabric, between the lines of your traced design, add a thin layer of hot glue.


·         Once the glue has cooled, carefully cut out your design.


·         Light your candle and lightly singe the edges of your ribbon (being careful not to burn it) to give it a finished off look (another reason why using a synthetic fabric is preferred for this process, as the edges will melt nicely)


·         Your iron on ribbon is now ready for you to add to any garment or accessory of your choosing. The hot glue melts quite easily and quickly during the ironing process, so a use a “cool” to “warm” setting on your iron. Always practice a section of fabric first to make sure you have the temperature right before applying to the completed garment.


Happy Sewing!

Monday, September 7, 2015

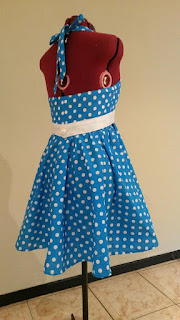
Add a waistband to your Rockabilly Style dress


Our Easy as Pie dress is incredibly cute on its own, but you are always welcome to give it a little extra something to have your friends and family complementing you on your sewing brilliance and stylish fashion sense.


Before and After

So to add a waistband to your Easy As Pie RockabillyStyle dress follow these few easy steps.

What you will need:
1.    The front and back bodice pattern pieces from your Easy as Pie Rockabilly dress sewing pattern (available in my online store, click on the button to the right of the page to buy yours now).
2.    25cm / 10” width of fabric of your choosing.
3.    25cm / 10” width of iron on interfacing
4.    25cm / 10” width of pattern tissue
5.    One to four buttons. The quantity of buttons you end up using will depend on how broad your waistband is and how big the buttons you choose are.
6.    Your completed Easy as Pie dress, in the size of your choosing.


Step 1: Place your pattern tracing paper over your back bodice pattern piece and trace the outline of the bottom of the pattern. 1.5cm / 5/8” above the bottom seam measure the desired width of your waistband. (I have gone for a 5cm / 2” width. Measure a further 1.5cm / 5/8” above this line for your seam allowance.

At the centre back seam add an additional 1.5cm 0r 5/8” to allow for an overlap for the button(s) and buttonhole(s)
\
Step 2: Do the same as above for your front bodice piece (except for the additional 1.5cm or 5/8”), only remember to exclude the dart from your waist band. Do this my measuring your waistband up the dart, then moving your pattern piece to continue after the dart again.


Make circles on the section where the dart would have been. You will be transferring these markings to your fabric to help you line up your waistband on your dress.


Step 3: Out of your waistband fabric cut four pieces of fabric for the back waistband pattern pieces. For the front waistband pattern piece, cut out two pieces of fabric on the fold.


Step 4:  Add iron on interfacing to the wrong side of two pieces of the back waistband section, and one piece of the front waistband section.


Step 5: Sew together the side seams of your waistband pieces and press open.


Step 6: Attach the waistband pieces together. Sew along the top and bottom seams and only one centre pack seam. Clip corners.


With the second centre back seam, measure 1.5cm / 5/8”, roll seam inwards and press into place. Loose tack to keep in place as you turn the waistband right way around.


Step 7: Turn waistband right way around and press. Stitch along the edge to finish off and to close the opening in the centre back seam.

Step 8: Make your buttonhole(s) and attach your button(s).


Step 9: With needle and thread catch your waistband onto your completed dress at the side seams and front darts.


Style tip: instead of stitching your waistband to your dress you can add press studs to the dress and waistband, making it detachable. This will allow for you to make an assortment of coloured waistbands that you can mix and match with your dress!

Step 10: Your dress is now ready to wear!

Happy Sewing!


Back of dress, before and after