Patterns

Showing posts with label high waist. Show all posts

Sunday, April 10, 2016

Free Sewing Pattern

A new month and a new opportunity to enter our Sewing Challenge! This month’s theme is Black & White... an exciting theme, which means you can use any of our patterns to create something for yourself in Black or white, or both. Remember to share your creations with us on twitter @MySewingPattern


This week’s patterns in review


You may have noticed that we haven’t  yet posted a picture of the complete skirt, we have decided that during the month of April, all our amazing followers who create this skirt can submit the pictures to us in twitter @MySewingPattern with #FreeSkirt, at the end of April we will pick our favourite picture shared from a fan, and use this as our cover picture for all future marketing related to the skirt.

So exciting, I can’t wait to see what you guys create. Until next time...


Happy sewing!


Thursday, January 21, 2016

Some latest sewing news

What an exciting week. We have so many patterns in their final stages, and we’ve launched a few new ones. Most importantly though, this week we launched our biggest competition!

Join our monthly sewing challenge and you could stand a chance to win an Acer Chromebook (click on the featured post to the right of the page to view all the finer details).

For our January sewing challenge the theme is “TIES”. I look forward to seeing all your entries on twitter (Remember to follow us at @Booleheart)
 

This week’s patterns in review


Our high waist skirts

There are a few items that every woman should have in her closet that are not only stylish, but timeless too. The pencil skirt is second only to the little black dress on this list.
 
Our knee length under dress makes the perfect LBD

Since we launched an ideal little black dress pattern last year, we thought that naturally the next best thing to do is launch out High Waist Business Skirt. It really compliments any business wardrobe with it’s strong, professional lines.
 
Me doing a selfie in the new skirt

This skirt is incredibly simple (only 2 pattern pieces) and very quick and easy to make. You can make a few of these skirts in different fabric options.

We decided to even create a shorter version. The Short High Waist Skirt really makes an ideal summer and party skirt. Make one in a fun print to suit your personality, or in simple black for a more elegant look.
 
Selfie time in the shorter skirt

Have fun with these skirts, they can even add a pin-up style to your current wardrobe, they are so straightforward and look like they are professionally made and not home made.

Happy sewing!


Tuesday, December 29, 2015

A Fine Vintage


In three days time we are going to find ourselves in a brand new year, filled with new opportunities and adventures... and of course more exciting sewing projects. This past year was filled with growth in leaps and bounds and we are thrilled with how our pattern range is growing. We currently have over 30 patterns and pattern variations and combinations available in store.

Our $1 sale will be running until the 31st so remember to take advantage of it while you can and stock up on those patterns. As from 1st January the prices will be returning to normal.

This year our vintage style patterns were our best sellers, so we have decided to share a few of these in review as we reflect back on the wonderful year we have had.

This week’s patterns in review 

High waist shorts

 
This is our best selling pattern of 2015! We have just had the most amazing feedback from this pattern which I based on 1940’s style summer shorts.

 
This pattern is so quick and easy that you can have an entire collection in an assortment of colors in a very short time. Vintage style is in, and this is an affordable and fashionable way to dress up your wardrobe.

Easy as Pie Rockabilly Style Dress

 
This is such a cute dress, it can be made in an assortment of colors and fabrics for the Rockabilly fan in all of us. 
We have posted an earlier blog post to help you create a waistband to give your dress the perfect finish. You can even create a variety of different color waistbands to mix and match and give your dresses more versatility, so remember to look into our archives too!

Trumpet style gown

 
The Trumpet style bridal gown pattern in our online store is our first official bridal pattern. We are so excited to be launching it, and there will be many more bridal patterns to come in 2016.

 
Trumpet style gown in champagne satin with additional flowers appliquéd down its length.

Remember to check our previous blog posts for the TWO competitions we are currently running.

Have a wonderful New Year. Happy 2016 and happy sewing!
 

Monday, September 7, 2015

Add a waistband to your Rockabilly Style dress


Our 
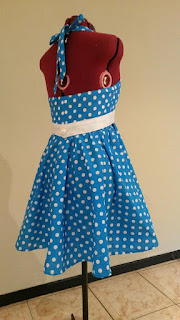
Easy as Pie dress is incredibly cute on its own, but you are always welcome to give it a little extra something to have your friends and family complementing you on your sewing brilliance and stylish fashion sense.


Before and After

So to add a waistband to your Easy As Pie RockabillyStyle dress follow these few easy steps.

What you will need:
1.    The front and back bodice pattern pieces from your Easy as Pie Rockabilly dress sewing pattern (available in my online store, click on the button to the right of the page to buy yours now).
2.    25cm / 10” width of fabric of your choosing.
3.    25cm / 10” width of iron on interfacing
4.    25cm / 10” width of pattern tissue
5.    One to four buttons. The quantity of buttons you end up using will depend on how broad your waistband is and how big the buttons you choose are.
6.    Your completed Easy as Pie dress, in the size of your choosing.


Step 1: Place your pattern tracing paper over your back bodice pattern piece and trace the outline of the bottom of the pattern. 1.5cm / 5/8” above the bottom seam measure the desired width of your waistband. (I have gone for a 5cm / 2” width. Measure a further 1.5cm / 5/8” above this line for your seam allowance.

At the centre back seam add an additional 1.5cm 0r 5/8” to allow for an overlap for the button(s) and buttonhole(s)
\
Step 2: Do the same as above for your front bodice piece (except for the additional 1.5cm or 5/8”), only remember to exclude the dart from your waist band. Do this my measuring your waistband up the dart, then moving your pattern piece to continue after the dart again.


Make circles on the section where the dart would have been. You will be transferring these markings to your fabric to help you line up your waistband on your dress.


Step 3: Out of your waistband fabric cut four pieces of fabric for the back waistband pattern pieces. For the front waistband pattern piece, cut out two pieces of fabric on the fold.


Step 4:  Add iron on interfacing to the wrong side of two pieces of the back waistband section, and one piece of the front waistband section.


Step 5: Sew together the side seams of your waistband pieces and press open.


Step 6: Attach the waistband pieces together. Sew along the top and bottom seams and only one centre pack seam. Clip corners.


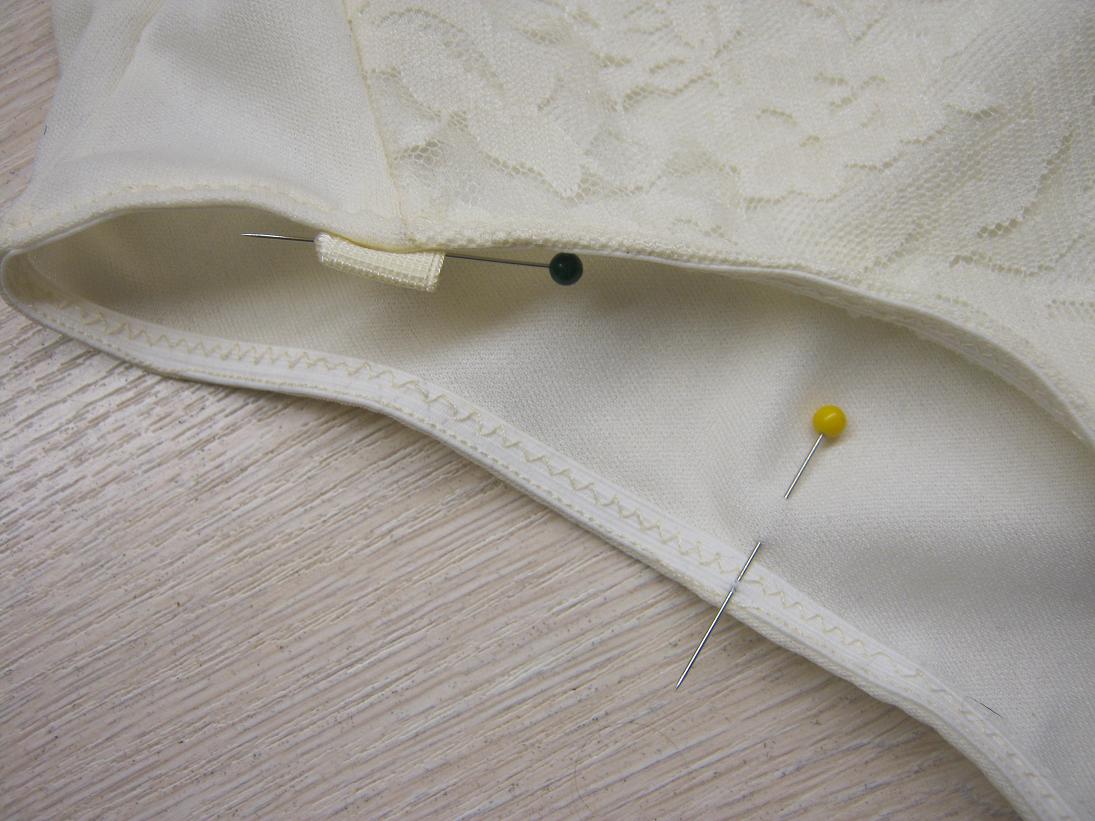
With the second centre back seam, measure 1.5cm / 5/8”, roll seam inwards and press into place. Loose tack to keep in place as you turn the waistband right way around.


Step 7: Turn waistband right way around and press. Stitch along the edge to finish off and to close the opening in the centre back seam.

Step 8: Make your buttonhole(s) and attach your button(s).


Step 9: With needle and thread catch your waistband onto your completed dress at the side seams and front darts.


Style tip: instead of stitching your waistband to your dress you can add press studs to the dress and waistband, making it detachable. This will allow for you to make an assortment of coloured waistbands that you can mix and match with your dress!

Step 10: Your dress is now ready to wear!

Happy Sewing!


Back of dress, before and after

Tuesday, June 23, 2015

Tutorial: Adding suspenders to vintage style knickers

Finally, I am happy to share with you the remarkably easy process of adding suspenders to your vintage style knickers!

This tutorial is is now available in our online store... click on the link to the right of the page to view.


Enjoy and Happy Sewing!


Friday, June 5, 2015

Free tutorial: Adding suspenders to vintage style knickers


Finally, I am happy to share with you the remarkably easy process of adding suspenders to your vintage style knickers!

This tutorial is for removable suspenders, so you can still wear your vintage knickers on those days that you don’t feel like wearing those thigh-high stockings.

What you will need to accomplish this:


4 x brassier sliders
4 x suspender grips
4 x slide on suspender hooks
4 x 30cm / 12 inch lengths of 1.5cm / 5/8” wide lingerie elastic, or wide enough to fit your sliders, grips and hooks of choice.
Your newly made vintage style knickers (click on the button to the right of the blog to go to my online store to purchase your easy to follow pattern)


STEP 1


Mark the position of your suspenders on your knickers with pins. In the front it will be at the bottom of the front seams. The back section will be exactly in line with these seams.

STEP 2


Cut 2cm / ¾” piece of elastic from each of your 30cm / 12 inch elastic lengths. Fold in half to form a loop and pin in place along the positions you marked in step 1.

This is the loop that the hook for your suspenders will slide onto.

STEP 3


With the longer lengths of elastic, loop one end over the centre part of your brassier slider and stitch into place.

STEP 4


Along the right side / top side of the lingerie elastic, slide down your suspender grips.

STEP 5


Slide the open end of the elastic through the brassier slider, right side of elastic facing upwards.

STEP 6


Loop the open end of the elastic over the closed end of the suspenders hook and stitch into place.

You can now hook your suspenders onto your vintage style knickers and they are ready to wear!


How incredibly easy was that? Doesn’t it just inspire you to make sexy lingerie to wear every day? And all of us ladies know, when our underwear makes us feel good, we tend to have wonderful, confident days! Why not make yourself a pair of vintage style knickers to wear every day, and face the world knowing that you are a beautiful, strong and confident woman!


Enjoy and Happy Sewing!


Friday, May 22, 2015

Really Easy high waist shorts


I absolutely love my high waist, vintage style shorts. They are so quick and easy to make and I have made them in an assortment of colors for myself.


They should take no more than an two hours to make (if not one, depending on how prepared you are and how fast you work), and can be made in just 10 easy steps

I hope you enjoy this pattern as much as I do! Click on the button to the right of my blog to go to my online store and get yourself the digital version of this pattern now!


While making the denim pair for the instructions I was inspired to add some brass buttons I had lying around... the result was fabulous! Feel free to play around with embellishments for your shorts too, you can really have so much fun with these!


HAPPY SEWING!