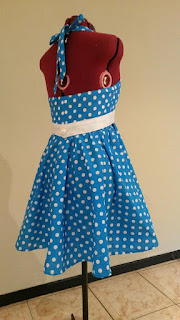
Our Easy as Pie dress is incredibly cute on its own,
but you are always welcome to give it a little extra something to have your
friends and family complementing you on your sewing brilliance and stylish
fashion sense.
Before and After
So to add a waistband to your Easy As Pie RockabillyStyle dress follow these few easy steps.
What you will need:
1.
The front and back bodice
pattern pieces from your Easy as Pie Rockabilly dress sewing pattern
(available in my online store, click on the button to the right of the page to
buy yours now).
2.
25cm / 10” width of fabric
of your choosing.
3.
25cm / 10” width of iron on
interfacing
4.
25cm / 10” width of pattern
tissue
5.
One to four buttons. The
quantity of buttons you end up using will depend on how broad your waistband is
and how big the buttons you choose are.
6.
Your completed Easy as
Pie dress, in the size of your choosing.
Step 1: Place your pattern tracing paper over your back
bodice pattern piece and trace the outline of the bottom of the pattern. 1.5cm
/ 5/8” above the bottom seam measure the desired width of your waistband. (I
have gone for a 5cm / 2” width. Measure a further 1.5cm / 5/8” above this line
for your seam allowance.
At the centre back seam add an additional 1.5cm 0r 5/8” to allow
for an overlap for the button(s) and buttonhole(s)
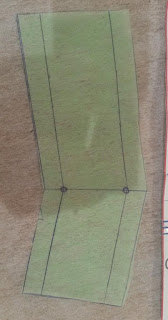
Step 2: Do the same as above for your front bodice
piece (except for the additional 1.5cm or 5/8”), only remember to exclude the
dart from your waist band. Do this my measuring your waistband up the dart,
then moving your pattern piece to continue after the dart again.
Make circles on the section where the dart would have been.
You will be transferring these markings to your fabric to help you line up your
waistband on your dress.
Step 3: Out of your waistband fabric cut four pieces
of fabric for the back waistband pattern pieces. For the front waistband
pattern piece, cut out two pieces of fabric on the fold.
Step 4: Add
iron on interfacing to the wrong side of two pieces of the back waistband
section, and one piece of the front waistband section.
Step 5: Sew together the side seams of your waistband
pieces and press open.
Step 6: Attach the waistband pieces together. Sew
along the top and bottom seams and only one centre pack seam. Clip corners.
With the second centre back seam, measure 1.5cm / 5/8”, roll
seam inwards and press into place. Loose tack to keep in place as you turn the
waistband right way around.
Step 7: Turn waistband right way around and press. Stitch
along the edge to finish off and to close the opening in the centre back seam.
Step 8: Make your buttonhole(s) and attach your
button(s).
Step 9: With needle and thread catch your waistband
onto your completed dress at the side seams and front darts.
Style tip: instead
of stitching your waistband to your dress you can add press studs to the dress
and waistband, making it detachable. This will allow for you to make an
assortment of coloured waistbands that you can mix and match with your dress!
Step 10: Your dress is now ready to wear!
Happy Sewing!
Back of dress,
before and after


No comments:
Post a Comment