Patterns

Showing posts with label vintage. Show all posts

Friday, January 15, 2016

Bridal designs galore

My bridal range has just taken off so well with my patterns having become extremely popular. I am super grateful and I am hard at work expanding my range.

Sweetheart Trumpet style gown

This is a fit and flare style gown, it is designed to hug the figure closely until midway between the knees and hips, where it flares out. Adding applique lace to this design gives it an elegant and timeless finish.


Princess style gown

The pattern for this dress is currently available for pre-order. It has a corset bodice which is complimented by the layers of skirt that flow behind the bride to be. This gown will make any bride feel like the amazing, special person that she is, on her wedding day.

Empire style gown

A classic and timeless cut, this gown suits the bride who knows who she is and carries a natural grace and beauty with her wherever she goes. It can also be used to create bridesmaid dresses.

Plus many more to come

This is just the beginning, there are many more designs to come over the upcoming year.


Tuesday, December 29, 2015

A Fine Vintage


In three days time we are going to find ourselves in a brand new year, filled with new opportunities and adventures... and of course more exciting sewing projects. This past year was filled with growth in leaps and bounds and we are thrilled with how our pattern range is growing. We currently have over 30 patterns and pattern variations and combinations available in store.

Our $1 sale will be running until the 31st so remember to take advantage of it while you can and stock up on those patterns. As from 1st January the prices will be returning to normal.

This year our vintage style patterns were our best sellers, so we have decided to share a few of these in review as we reflect back on the wonderful year we have had.

This week’s patterns in review 

High waist shorts

 
This is our best selling pattern of 2015! We have just had the most amazing feedback from this pattern which I based on 1940’s style summer shorts.

 
This pattern is so quick and easy that you can have an entire collection in an assortment of colors in a very short time. Vintage style is in, and this is an affordable and fashionable way to dress up your wardrobe.

Easy as Pie Rockabilly Style Dress

 
This is such a cute dress, it can be made in an assortment of colors and fabrics for the Rockabilly fan in all of us. 
We have posted an earlier blog post to help you create a waistband to give your dress the perfect finish. You can even create a variety of different color waistbands to mix and match and give your dresses more versatility, so remember to look into our archives too!

Trumpet style gown

 
The Trumpet style bridal gown pattern in our online store is our first official bridal pattern. We are so excited to be launching it, and there will be many more bridal patterns to come in 2016.

 
Trumpet style gown in champagne satin with additional flowers appliquéd down its length.

Remember to check our previous blog posts for the TWO competitions we are currently running.

Have a wonderful New Year. Happy 2016 and happy sewing!
 

Friday, October 23, 2015

Adding a belt to your batwing dress


This is a quick guide on how to create a sash belt to compliment my pattern for the summer batwing dress.


Dress before and after adding a belt

You will need:
·         Your summer batwing dress, made from the sewing pattern available in my online store (click on the button to the right of the page).
·         10cm / 4 inch length of fabric, cut from the width of the same fabric used to create your dress.

Step 1:

Cut your piece of fabric 10cm / 4inch wide (The bias will form the short sides of the section of fabric cut).


Step 2:

Fold your fabric in half, right sides facing and sew the open seam closed (keeping a 1.5cm / 5/8” seam allowance). Use your overlocker / serger to neaten the edge.


Step 3:

Turn the belt the right way around and press flat.


Step 4:

If you would like to add the belt as a permanent feature, find the center point of the belt and attach this to the dress by doing a hand stitch on the center back seam along the the waistline.


Your dress with matching sash belt is now ready to wear!


Happy Sewing!

Tuesday, July 14, 2015

Rockabilly Appliqué

A lace skull can be used to create a rockabilly look for that dress or garment in your closet that you need an excuse to wear.

I took a very simple dress that has been sitting on my clothing rack for a while, I added a halter neck strap and waistband to give it a more vintage look, but to give it an awesome alternative, rockabilly twist I decided to create a lace “sugar” skull to appliqué onto it.


                                                     Before                                  After


Appliqué is the process where a small piece of fabric is added onto a larger piece of fabric to create a decorative feature.

 Step 1:

I printed a black and white image of a sugar skull to use as a stencil. I then traced the outlines onto a piece of tear away interfacing.


Tip: The pen I used to trace with is a Pilot “Frixion” pen, I used this because in order to get rid of the lines all I need to do is iron over the image and they disappear. (I actually much rather prefer using this pen to conventional dressmaker’s marking pens or pencils)

Step 2:

Pin the piece of lace of your choice over the traced lines on the interfacing.

Step 3:

I set my sewing machine to the smallest zigzag stitch and used this to sew over the lines I had marked, sewing the lace to the interfacing. I went over the lines twice.

Step 4:

I trimmed the excess lace away from around the shape of the skull, I then cut out the eyes, mouth and nose.


Step 5:

Tear away the interfacing, and wash or iron away the traced markings. Your lace “sugar” skull is now ready to add to your garment for that alternative look!


You can even add rhinestones or beading for a little something extra!


Happy Sewing!


Tuesday, June 23, 2015

Tutorial: Adding suspenders to vintage style knickers

Finally, I am happy to share with you the remarkably easy process of adding suspenders to your vintage style knickers!

This tutorial is is now available in our online store... click on the link to the right of the page to view.


Enjoy and Happy Sewing!


Friday, June 5, 2015

Free tutorial: Adding suspenders to vintage style knickers


Finally, I am happy to share with you the remarkably easy process of adding suspenders to your vintage style knickers!

This tutorial is for removable suspenders, so you can still wear your vintage knickers on those days that you don’t feel like wearing those thigh-high stockings.

What you will need to accomplish this:


4 x brassier sliders
4 x suspender grips
4 x slide on suspender hooks
4 x 30cm / 12 inch lengths of 1.5cm / 5/8” wide lingerie elastic, or wide enough to fit your sliders, grips and hooks of choice.
Your newly made vintage style knickers (click on the button to the right of the blog to go to my online store to purchase your easy to follow pattern)


STEP 1


Mark the position of your suspenders on your knickers with pins. In the front it will be at the bottom of the front seams. The back section will be exactly in line with these seams.

STEP 2


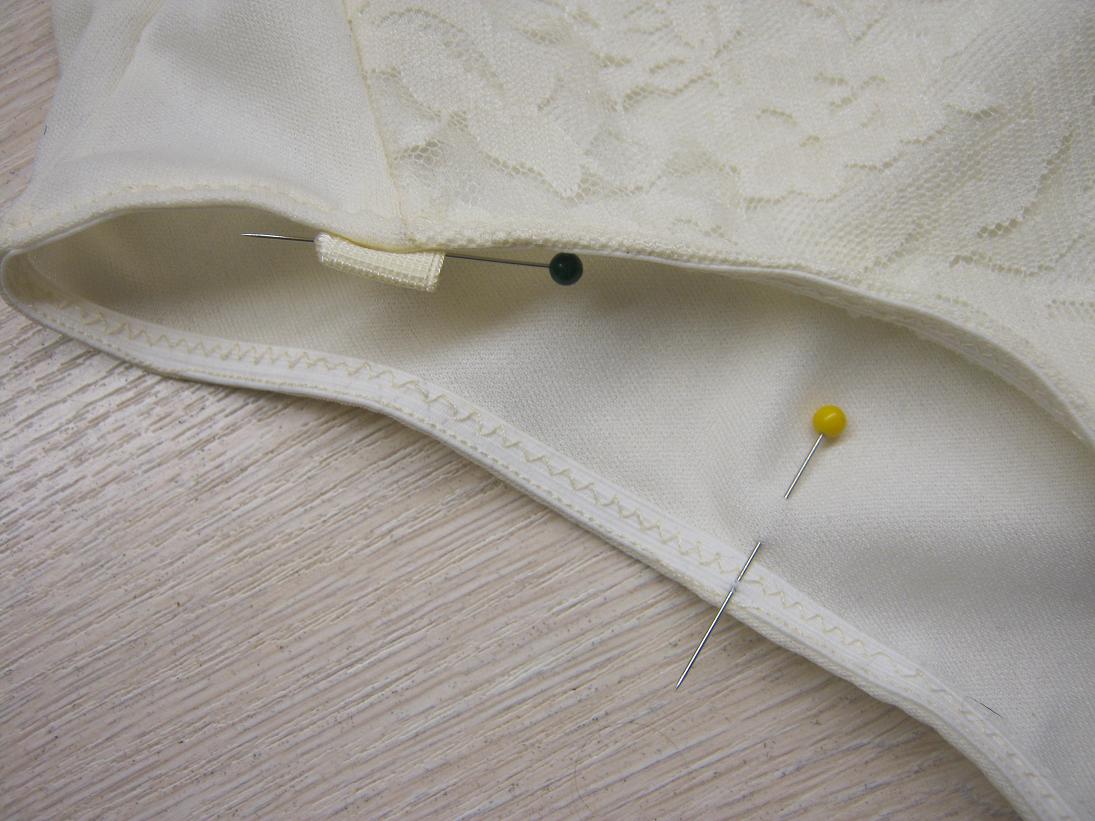
Cut 2cm / ¾” piece of elastic from each of your 30cm / 12 inch elastic lengths. Fold in half to form a loop and pin in place along the positions you marked in step 1.

This is the loop that the hook for your suspenders will slide onto.

STEP 3


With the longer lengths of elastic, loop one end over the centre part of your brassier slider and stitch into place.

STEP 4


Along the right side / top side of the lingerie elastic, slide down your suspender grips.

STEP 5


Slide the open end of the elastic through the brassier slider, right side of elastic facing upwards.

STEP 6


Loop the open end of the elastic over the closed end of the suspenders hook and stitch into place.

You can now hook your suspenders onto your vintage style knickers and they are ready to wear!


How incredibly easy was that? Doesn’t it just inspire you to make sexy lingerie to wear every day? And all of us ladies know, when our underwear makes us feel good, we tend to have wonderful, confident days! Why not make yourself a pair of vintage style knickers to wear every day, and face the world knowing that you are a beautiful, strong and confident woman!


Enjoy and Happy Sewing!


Friday, May 22, 2015

Really Easy high waist shorts


I absolutely love my high waist, vintage style shorts. They are so quick and easy to make and I have made them in an assortment of colors for myself.


They should take no more than an two hours to make (if not one, depending on how prepared you are and how fast you work), and can be made in just 10 easy steps

I hope you enjoy this pattern as much as I do! Click on the button to the right of my blog to go to my online store and get yourself the digital version of this pattern now!


While making the denim pair for the instructions I was inspired to add some brass buttons I had lying around... the result was fabulous! Feel free to play around with embellishments for your shorts too, you can really have so much fun with these!


HAPPY SEWING!


Wednesday, May 13, 2015

Bare bottomed... well, almost!

Oh my goodness! I stripped down to my knickers for my fans last night. o_O

While bravely parading around almost bare bottomed, and trying my best to look as if I have hips (I have a straight figure and am not as well endowed in that area as I would like), I was reminded of how close we are to winter in the cool evening.

I persevered though, and promised to reward myself with one of my home baked date and citrus muffins afterwards (with a hot cup of coffee).


Here are a few shots I managed to pull off for you guys, remember to pop into my online store (click on the button to the right to visit my store) and keep an eye out on this blog space as soon I will be posting the free tutorial on how to add suspenders to your vintage style knickers.


And I have decided that since I love my sewing fans so much, for the first 10 people to purchase this pattern, I will throw in a free g-string pattern! (Will be emailed to you shortly after receiving your purchase confirmation email). Thank you everyone for your wonderful support.

Happy Sewing!