For the home – as this month draws to an end, I’m already
feeling inspired to mention the theme for our August sewing challenge, and that
theme is For the Home.
To find out more about our sewing challenge and how you can
win click here!
We bought our first home a little over a year ago, it’s a
project that sees us renovating almost every weekend and in our spare time, and
we love it. Of course as a sewing enthusiast I’m always looking to sew those
extra finishing touches that really turn a house into a home. There are a few
new things I’m attempting for the first time (like curtains) and a few good old
sewing patterns that I always turn to in times like these... like my favourite zip
up cushion cover tutorial.
Pattern of the week

Quick, simple and really easy, this is a great sewing pattern for the novice home sewist who is looking to do a little re-decorating. Few things make a house feel more like a home than these scatter cushions. They really are one of the best finishing touches you can ass to any living space.
It's also a great pattern to help you to get rid of excess sewing scraps... or to give you an excuse to buy more fabric (just like the awesome fabric featured in this post).
Sewing find of the week

Yes, that’s right! Dr Who Fabric. We were so excited about this find (my heart belongs to sci-fi and many other geeky things). We found this fabric available through the Etsy Store HandPickedFabrics along with many other geek-themed fabrics (as well as many, many other wonderful non-geek themes). I am loving this Fabric so much that I’m already visualizing redecorating my living room so that I can include a few scatter cushions, that will give me the perfect excuse to buy some a few meters
.
Share your sewing products
If you have an Etsy store that sells physical sewing products and notions, and would like to feature them with us on social media, or in our blog, please click on the image for more information.

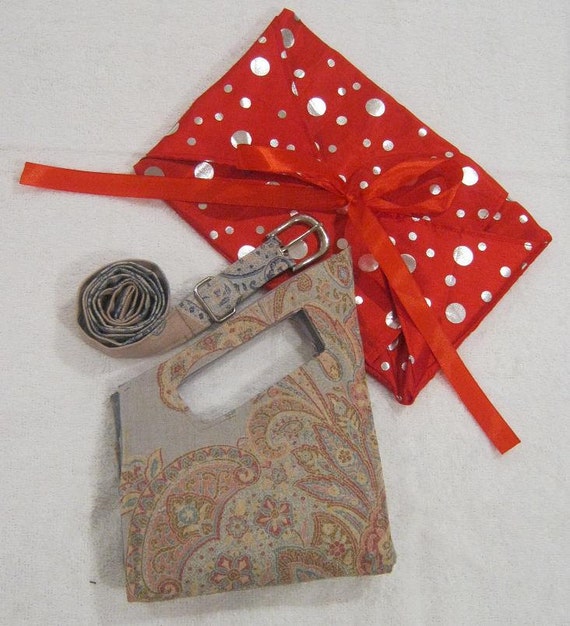
Tutorial of the week
Make a sleeve for
your tablet

Whenever I go out,
always like to take my little tablet with me. I have an online business,
and being able to be in touch with my clients constantly is a definite must.
Though I often struggle to find the perfect sleeve to keep my tablet protected
from the rest of the chaos that happens inside of my handbag, which is what
inspired me to create this really easy sleeve to keep it safe.
This tutorial can be easily adapted to any smart device,
even your phone.
What you need:
- A thick woven fabric. I usually like to use denims, or upholstery fabrics, this is because I know that these fabrics will stand the wear and tear.
- Thick fleece fabric. Try make it as thick as possible as this fleece has a dual purpose, firstly it cleans my screen nicely as I slide my tablet in and out of its sleeve, and secondly it gives the sleeve extra padding to keep my device protected.
- A decorative button... something pretty, because I can, but it also works as a closure. You are welcome to use press studs or Velcro strips instead if you prefer, however I find that over time these stop working effectively, or come undone on their own.
- White paper or cardboard to draw out your pattern on. The reason for this is, you never know when you would like to make another sleeve... perhaps one to match a new outfit or handbag. Make sure it is bigger than your device.
- Pencil, ruler, scissors and dressmakers tape – for measuring, drawing and cutting
- Sewing thread to match your fabrics.
Let’s get started...
Step 1: Measure along the longest length of your
tablet. Measure right the way around, this is because you need to include the
thickness of your tablet into your pattern.

Take this full measurement and divide by two. Add 4cm / 1.5
inches for a seam allowance and ease. Draw a line of this length on your piece
of cardboard.

Step 2: Measuring along the width of your tablet.
Measure right the way around again.

Take this full measurement and divide by two. Add 1.5cm /
5/8” for a seam allowance. And draw a line of this length on your piece of
cardboard.

Step 3: Mark out the rest of the rectangular shape
for your sewing pattern. On one of the longest sides mark that your pattern is
to be placed on the fold. On the opposite end, find the centre point and make a
marking for you to transfer onto your fabric.

Step 4: Mark out a second pattern piece according to
the following measurements. (you can make it bigger or smaller if you wish,
this is just a guideline.
Draw out a rectangle that is 6cm / 2.5” wide by 12cm / 5”
wide. This will be your closure flap.
Find the centre line that runs down the length of this
second pattern piece. In one end in the centre create a marking that you will
use to match up to the tablet sleeve marking. On the opposite end create a
marking 2cm / 6/8” from the end that will show where you will place your
buttonhole or press stud (this is the same end you will place on the fold when
cutting your fabric).

Step 5: Cut out your fabric. For the main sleeve
section and closure piece on the fold cut out one piece of fabric. Transfer
your pattern markings to the fabric.

Step 6: With right sides of fabric facing, keeping a
standard 1.5cm / 5/8” seam allowance, sew down the two longer open sides of
your closure flap and clip the two corners on the side by the fold.

Step 7: Turn your flap the right way out and press it
neatly. Do a top stitch along the closed sides, as close to the edge as
possible.

Step 8: Finish off your flap by sewing in your buttonhole
or attaching your press stud / Velcro at the marking.

Step 9: Right sides of fabric facing, attach your flap
to your main fabric piece at the marking you had made earlier and baste into
place.

Step 10: Right sides facing, use your fabric to cut
out your fleece lining.

Sew the seam around the edge of these two sections (keeping
a standard 1.5cm / 5/8” seam allowance) but leave a gap open on the opposite
end of the closure flap roughly 10cm / 4 inches long. Trim all the corners.

Step 11: Through the opening you left open, pull your
sleeve the right way out and
press neatly. Top stitch around the entire sleeve seam, as close to the edge as
possible, closing off the opening you had previously left.

Step 12: With fleece lining coming together, fold the
sleeve in half.
Stitch down the two sides of the sleeve, along the same
lines as your previous top stitch, to close off the sides of your tablet
sleeve.

Step 13: Finishing off, attach your button or other half
of your press stud / Velcro. Your new tablet sleeve is ready to use!